If you’re using Elementor, you can follow these steps to add custom CSS menu hover effects:
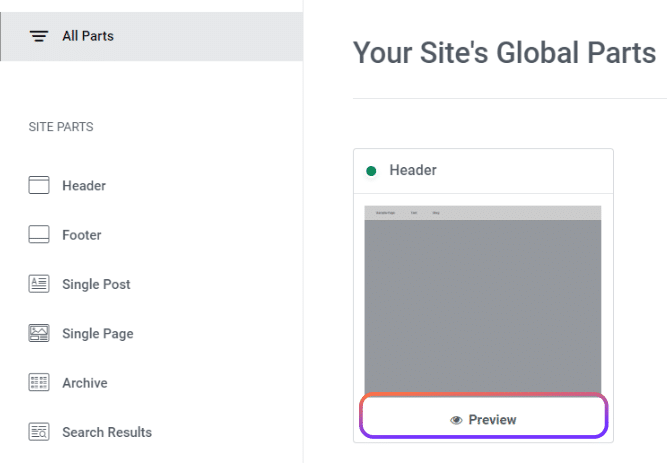
Open the Page/Template:
- Navigate to your WordPress dashboard and open the page you wish to edit with Elementor.
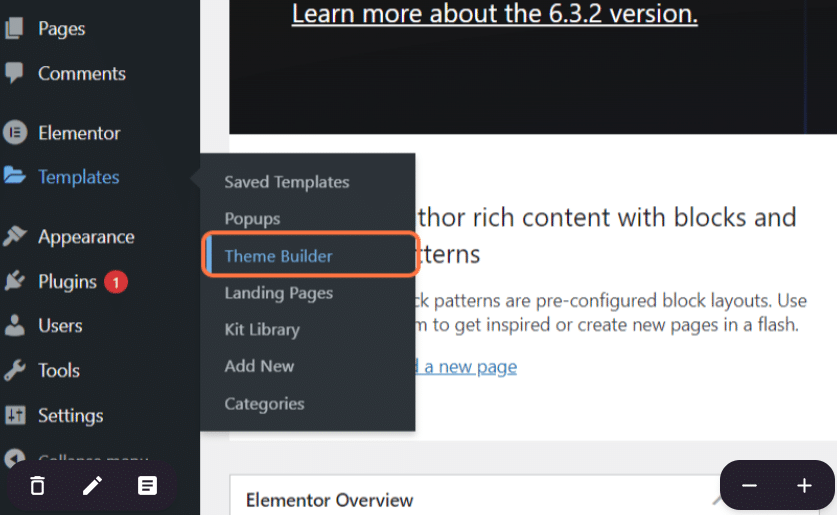
- Edit your “header”, “footer , or template that contains your menu.
Add/edit your navigation element:
- Navigate to your menu element or add the “WordPress Menu” element in the elements tab.
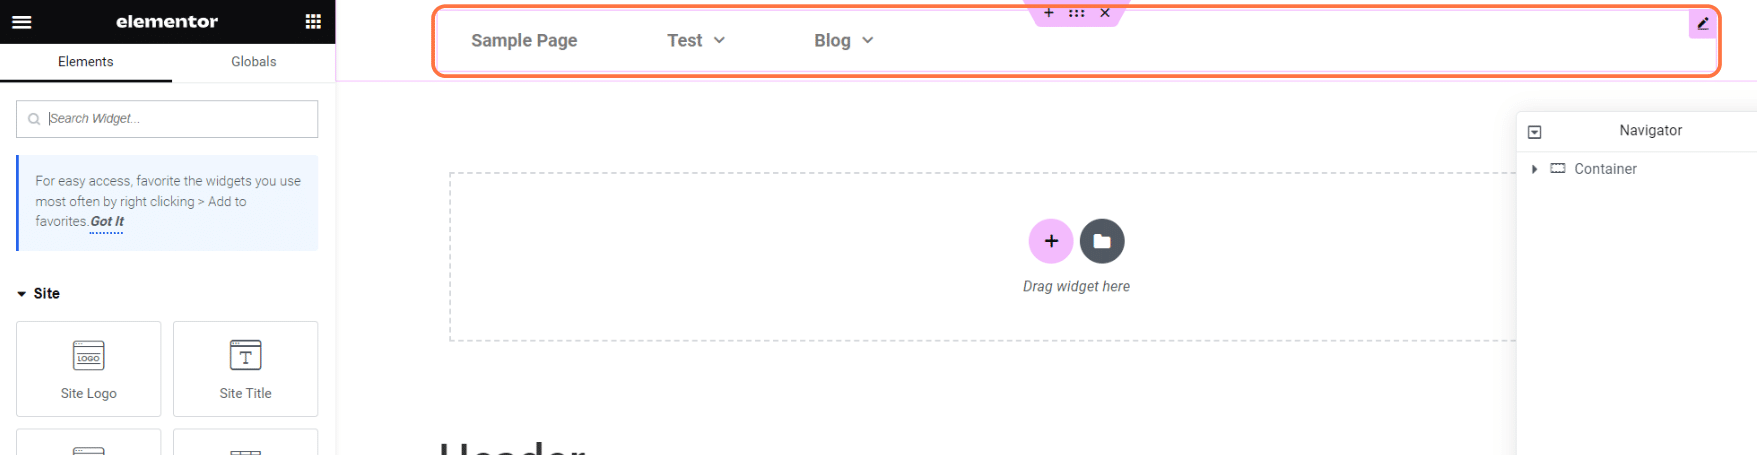
- Click the “advanced” tab on your element.
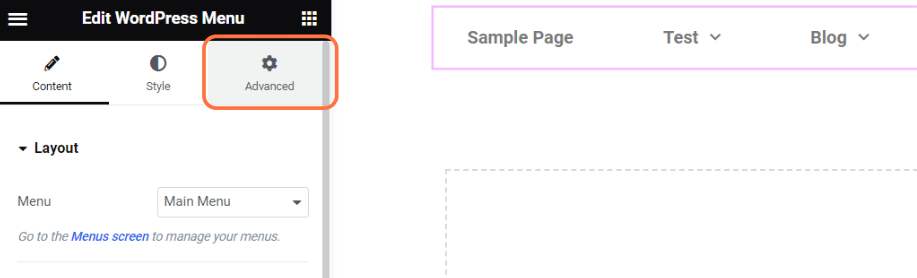
- Navigate to the “Custom CSS” dropdown.
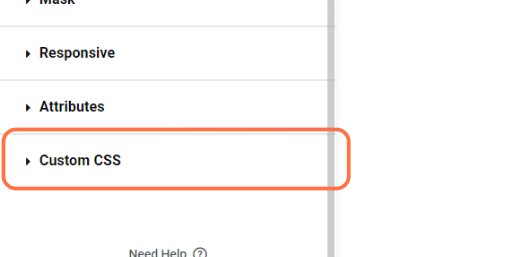
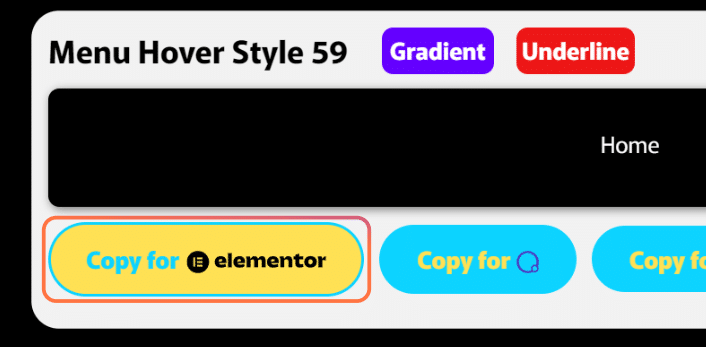
Copy CSS Style:
- Copy your desired menu hover style from the library on our homepage.
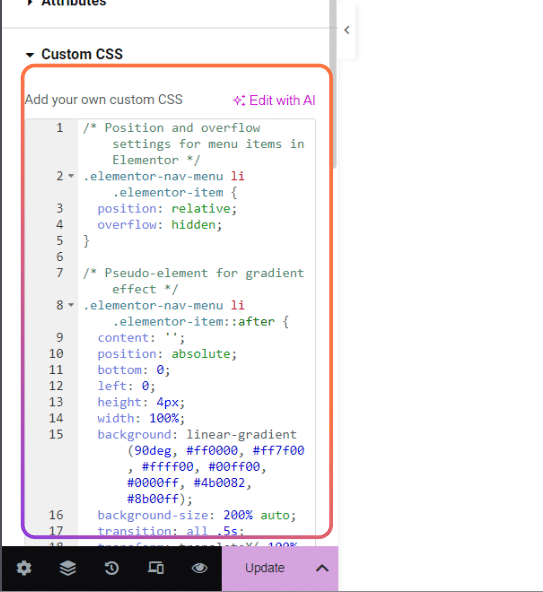
Add the CSS Code:
- Paste the CSS styles into the text area in the “Custom CSS” dropdown.
Edit colors:
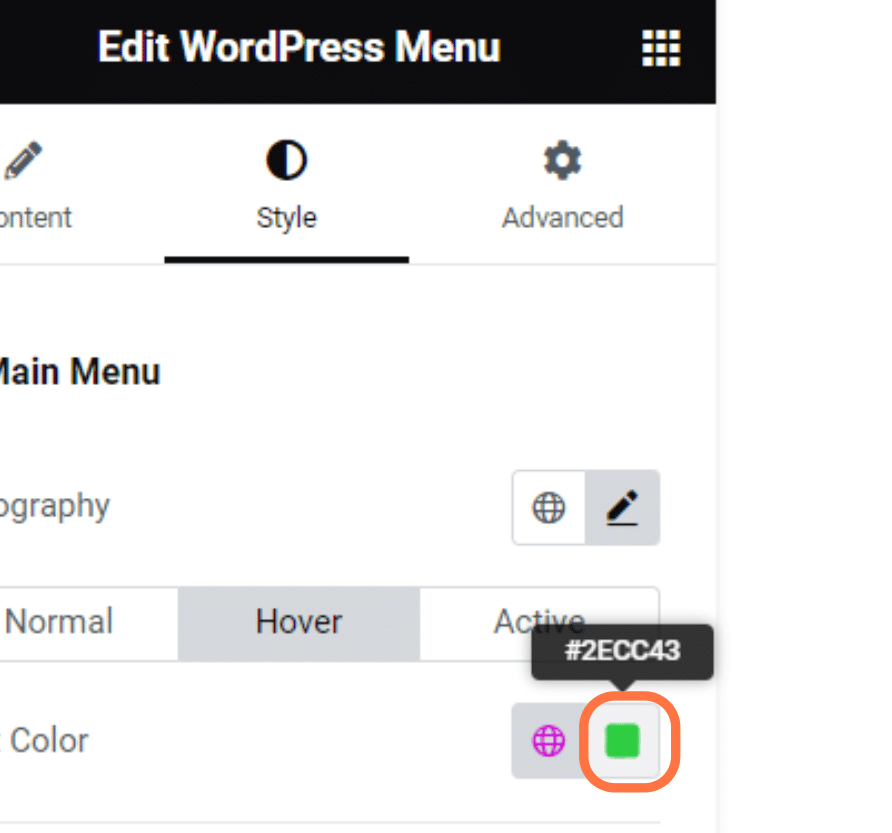
- Some menu styles use the default “Pointer” colors in Elementor. Navigate to the “Style” tab on your menu, then click “hover”, and finally edit the “color” under the color picker.
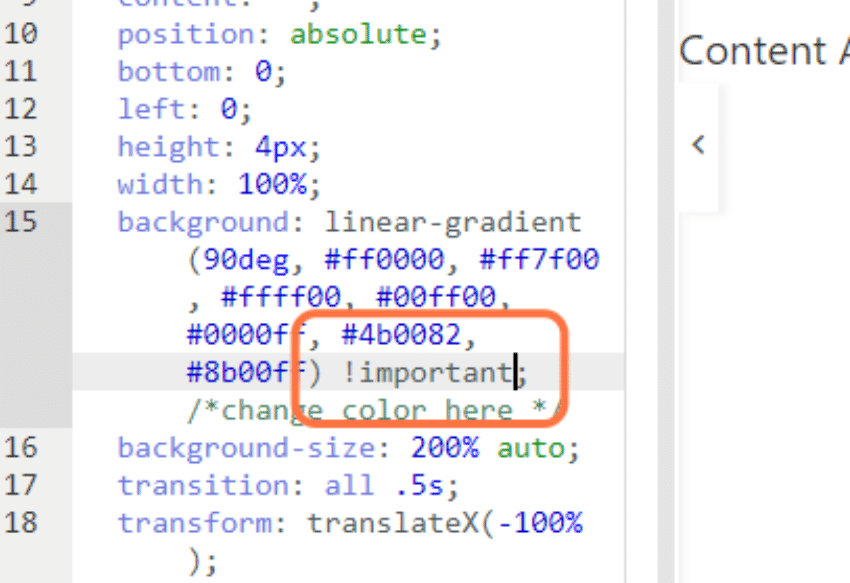
- Optional: To override Elementor’s default color styles, use !important before the closing “;”.
Save and Publish
- Click “Update” or “Publish” to apply the changes.